Access & Setup
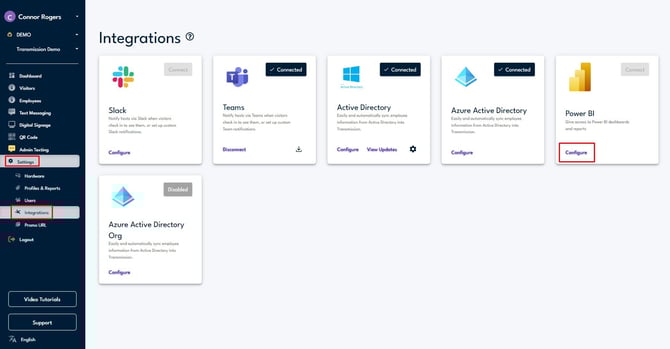
Step 1: Log into UnDesked and go to Settings > Integrations then click on Configure below the Power BI integration:
You will want to keep this page open on a separate tab as you will copy data over from PowerBI into these fields to complete the integration.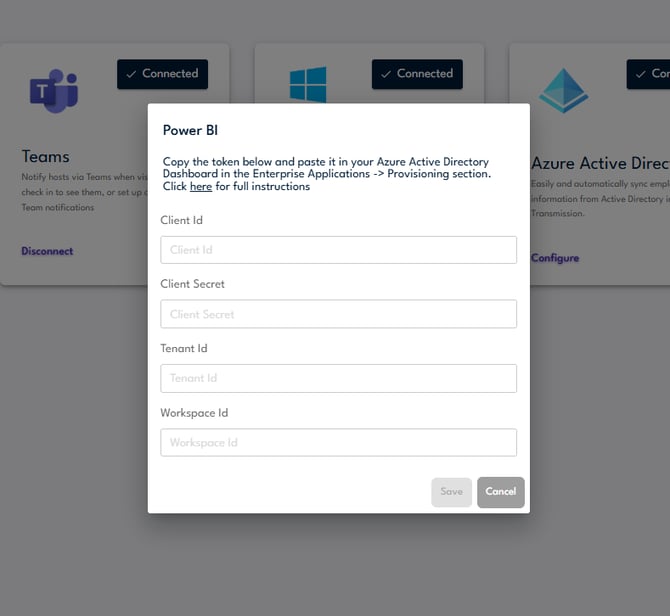
Step 2: In a separate tab, log into your Microsoft Azure account and select Microsoft Entra ID.

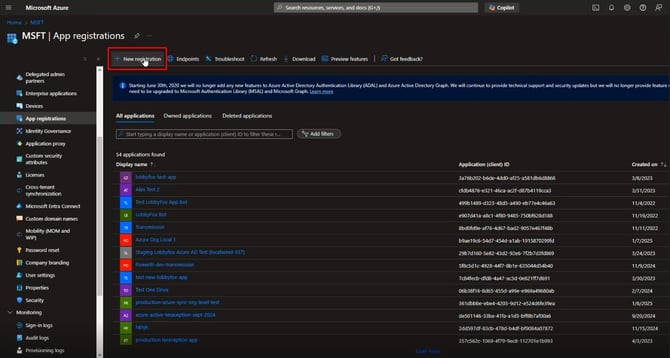
Step 3: Select App registrations in the drop down and click new registration.
Step 4: Create a name for the application and click register.
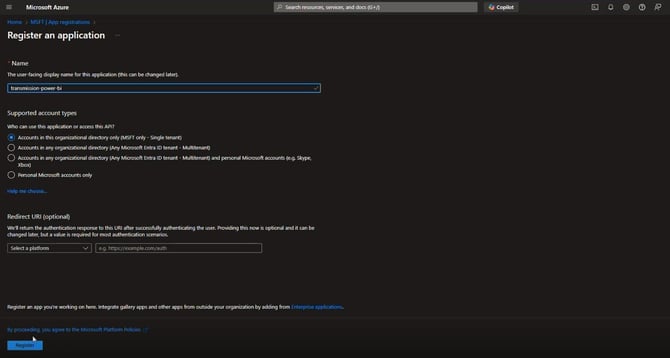
Step 5: You will be redirected to your application's page within azure. Select certificates and secrets, and click new client secret. Add a description and set an expiration date for the secret.
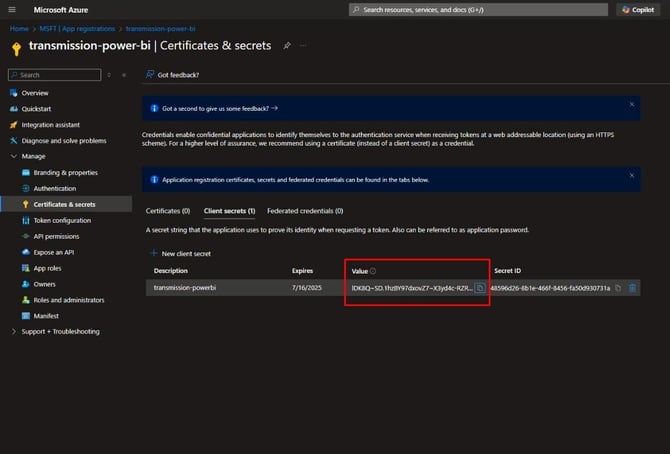
Step 6: This has generated the Secret ID that is used in the platform. Take the string of text from the "value" column and paste it within the "Secret ID" field within UnDesked.
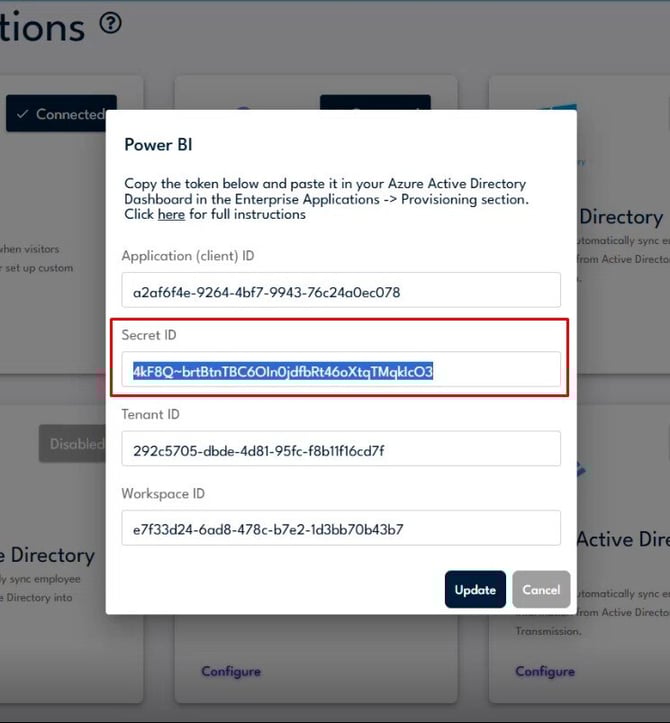
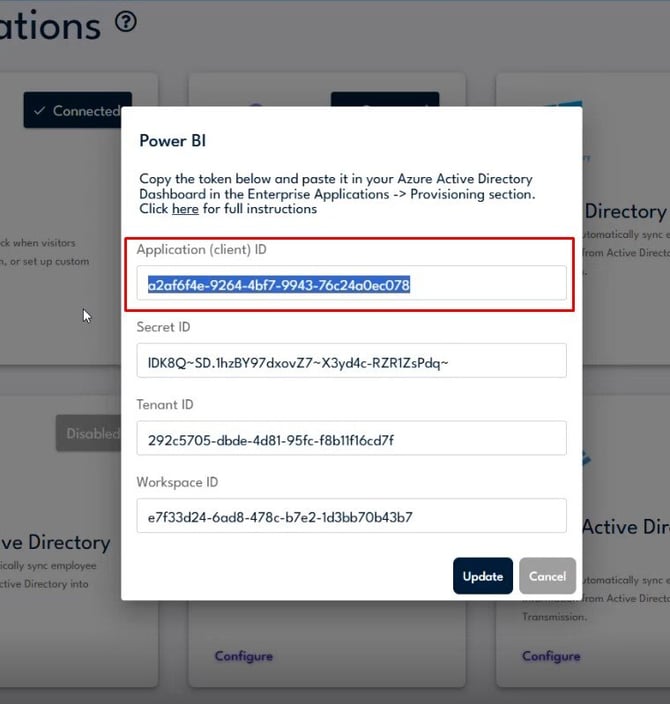
Step 7: Go back to the Azure tab and click on overview. Here you will copy the Application (Client) ID and paste it within the Application (Client) ID field in UnDesked.
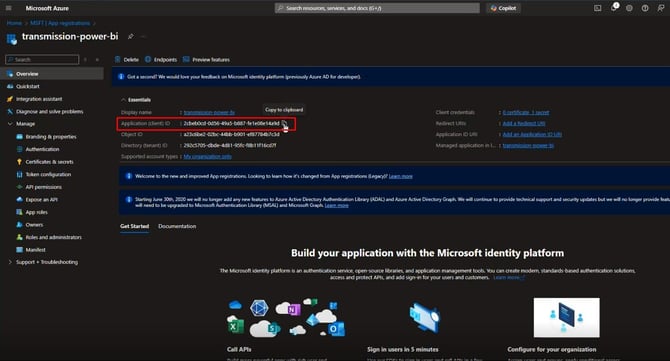
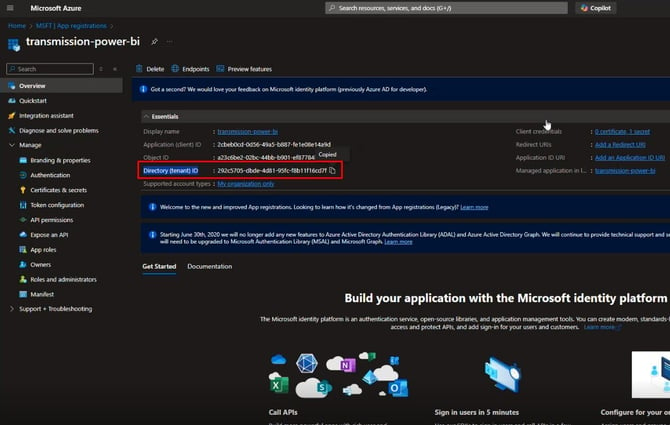
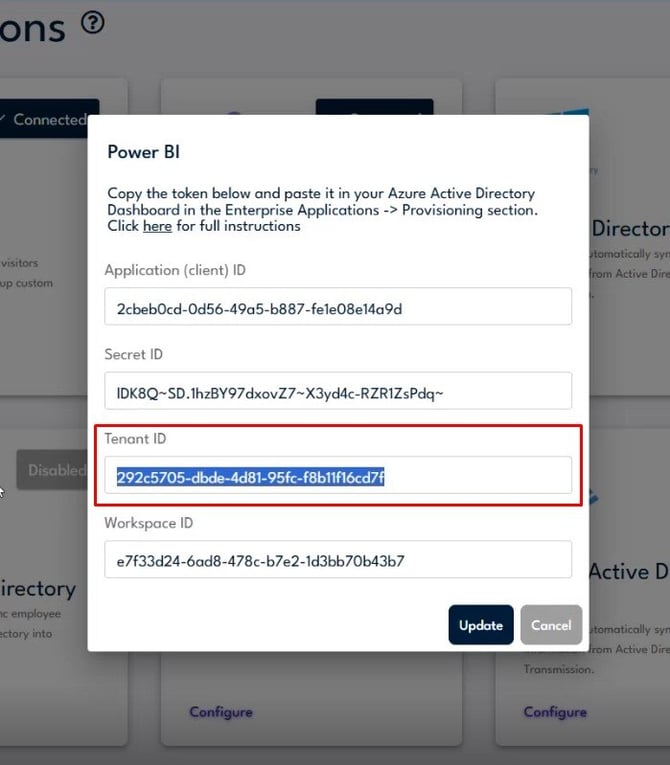
Step 8: Go back to the Azure tab and copy the Directory (tenant) ID and place it in the Tenant ID field in UnDesked.
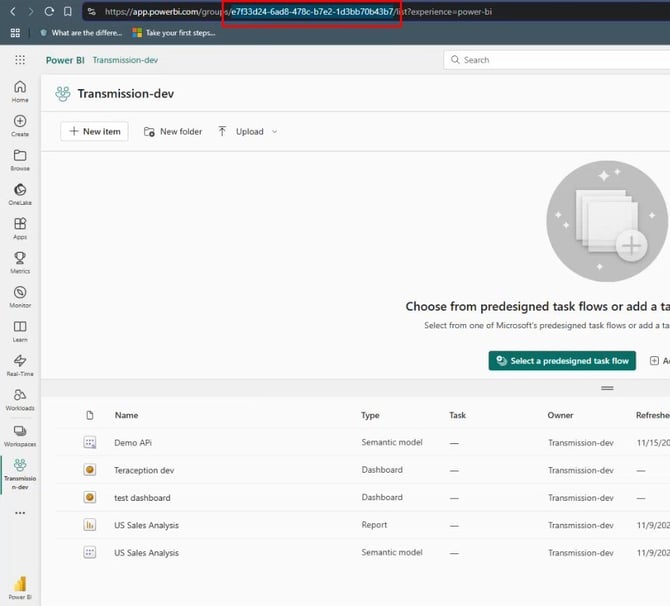
Step 9: Log into your PowerBI portal, click on Workspaces, and click on the workspace you'd like to assign to the integration.
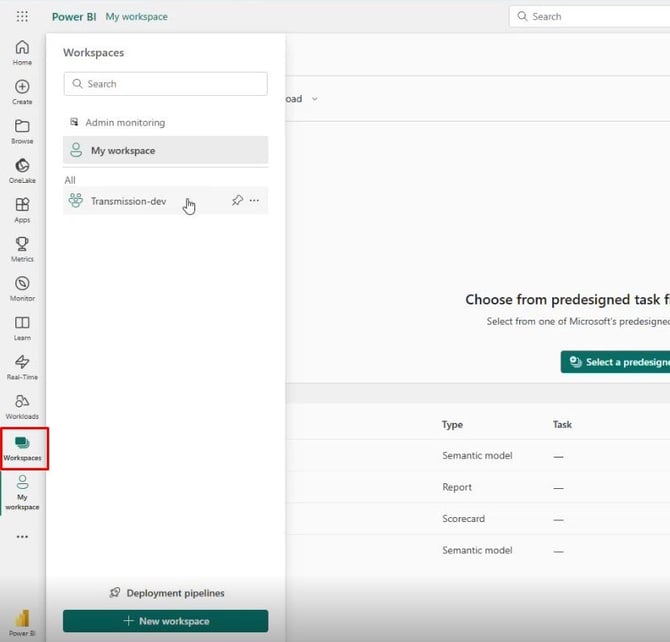
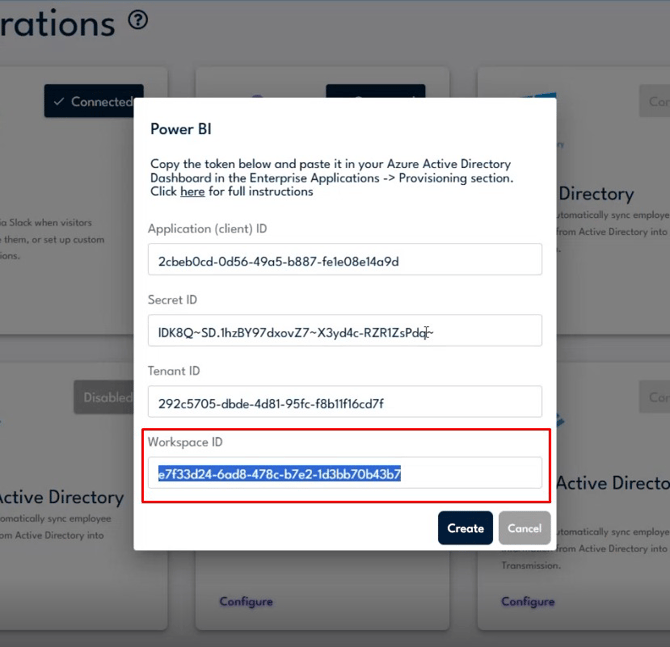
Step 10: Here you will copy the string of text as shown in the screenshot below and place it in the Workspace ID field within the UnDesked platform. Click Create to complete the integration.
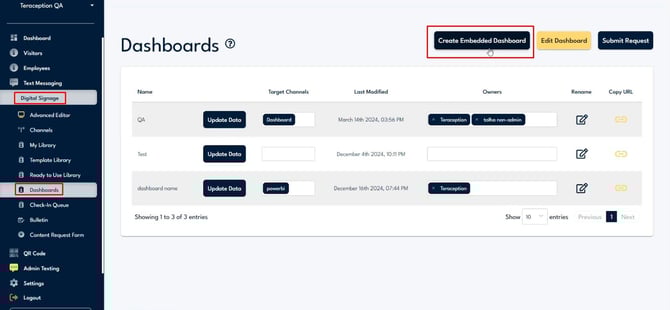
Step 11: Next you will want to assign the PowerBI content to a Dashboard. Within the UnDesked platform, click on Digital Signage, then Dashboards. Click on "Create Embedded Dashboard".
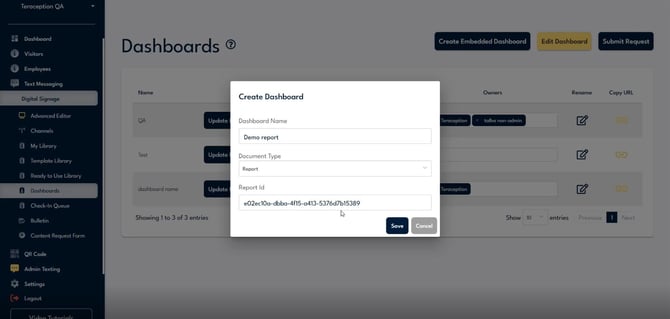
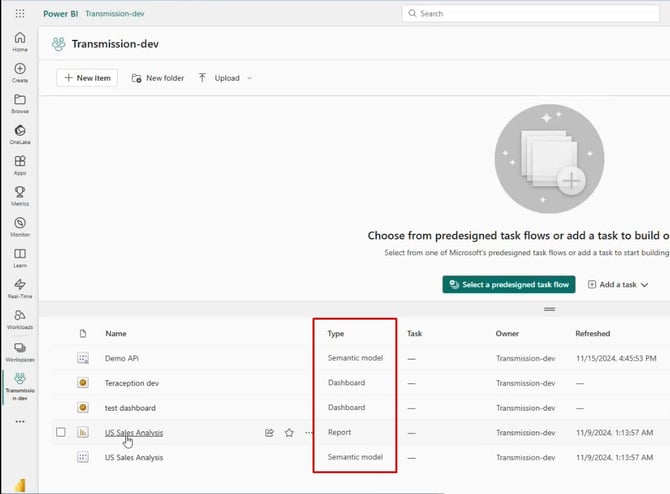
Step 12: Here you need to create a name for the dashboard, select the document type, and assign the appropriate ID.
Step 13: The document type can be found within the PowerBI portal in the type column.
If you select report, you will obtain the report ID from the report within PowerBI. Open the report and select the string of text from the URL as shown below.

If you select dashboard, you will obtain the dashboard ID from the dashboard within PowerBI. Open the dashboard and select the string of text from the URL as shown below.

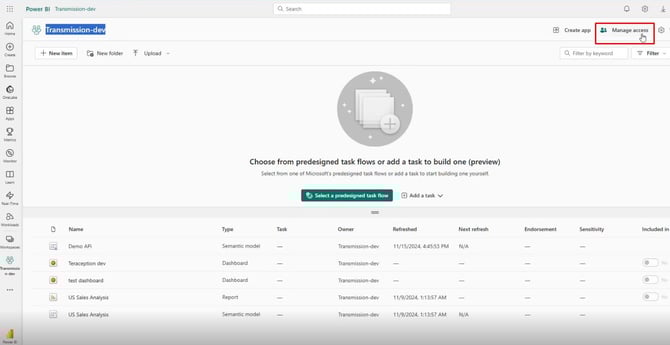
Step 14: It's important to make sure the application within azure has access to the workspace. Click on manage access in the top right corner of the PowerBI portal.
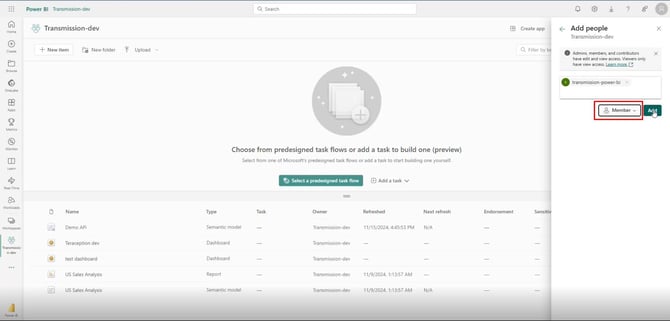
Click on add people or groups and search for the name you assigned to the application in Azure. Set the permission set to Member and click Add.
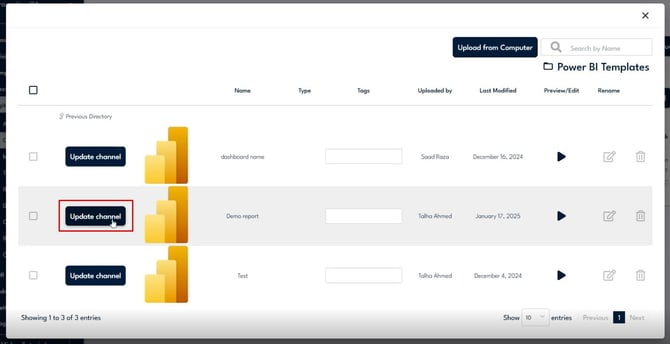
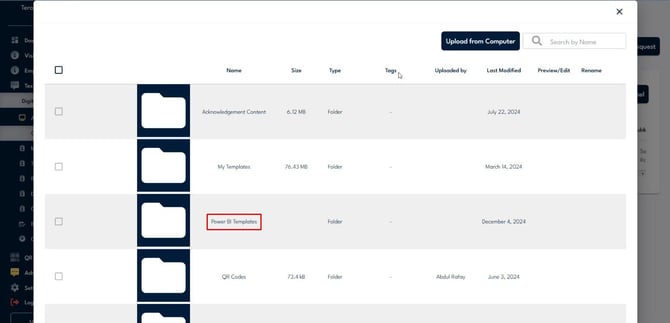
Step 15: To assign the content to a channel, click on the digital signage tab then click on channels. Click the add to channel button, then select the PowerBI templates folder.
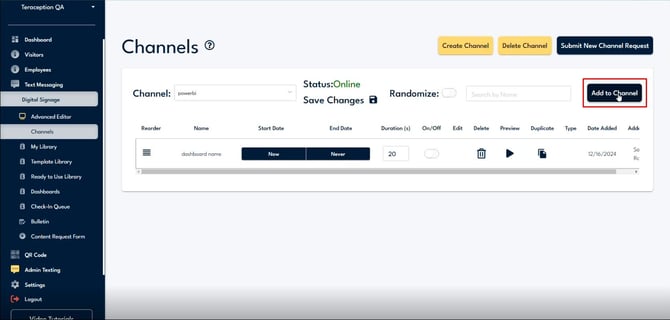
Navigate to the PowerBi template you want to display and click "update channel". Click on save changes to push the changes to the display.